journalctl
查看 nginx 日志时看到在每次启动服务后会出现一条错误信息:$ journalctl -u nginx
...
nginx.service: Failed to parse PID from file /opt/nginx/logs/nginx.pid: Invalid argument
...
查找了下原因,可能是 nginx 在启动时创建 nginx.pid 文件前 systemd 就在请求这个文件,所以出错了。
解决办法就是题前手动创建 systemd 需要的文件:
mkdir /etc/systemd/system/nginx.service.d
printf "[Service]\nExecStartPost=/bin/sleep 0.1\n" > /etc/systemd/system/nginx.service.d/override.conf
systemctl daemon-reload
以上处理就可以解决问题。
参考链接:
https://bugs.launchpad.net/ubuntu/+source/nginx/+bug/1581864
如果使用 nginx 作为反向代理服务器,可以使用 auth_basic 来实现页面加密。
环境需求:
Linux env
nginx
apache2-utils (Debian, Ubuntu) or httpd-tools (RHEL/CentOS/Oracle Linux)
安装环境:
nginx 安装参考:https://niekun.net/index.php/archives/30.html
安装 apache2-utils:
apt-get install apache2-utils
创建账户密码:
使用了 htpasswd 命令创建用户。
关于 htpasswd 的详细使用:https://httpd.apache.org/docs/2.4/programs/htpasswd.html
建议将账户信息文件建立在 nginx 目录,我放在 /etc/nginx/users 目录下:
htpasswd -c /etc/nginx/users/.adminpasswd user1
.adminpasswd 为隐藏的存储所有账户信息的文件,user1 为用户名,回车后会提示输入密码,然后确认密码。
建立其他账户:
htpasswd /etc/nginx/users/.adminpasswd user2
不需要 -c
参数,因为文件已经建立了。
验证账户密码 -v
:
htpasswd -v /etc/nginx/users/.adminpasswd user1
删除账户 -D
:
htpasswd -D /etc/nginx/users/.adminpasswd user1
使用账户:
打开 nginx 配置文件,在需要账户登录的路径段修改如下:
location /path {
...
auth_basic "Administrator's Area";
auth_basic_user_file /etc/nginx/users/.adminpasswd;
...
...
}
重新加载配置文件:
service nginx configtest
service nginx reload
打开对应页面测试是否提示输入账号密码。
]]>使用 nginx 的 autoindex 模块可以搭建简单的文件分享页面,但默认的页面比较简陋:
autoindex 搭建教程参考:https://niekun.net/index.php/archives/26.html
如果需要更加美观和丰富的页面,可以使用第三方模块 fancyindex 来实现。
fancyindex GitHub 主页:https://github.com/aperezdc/ngx-fancyindex#fancyindex-time-format
The Fancy Index module makes possible the generation of file listings, like the built-in autoindex module does, but adding a touch of style.
使用 fancyindex 首先需要安装带有 fancyindex 模块的 nginx,需要在编译 nginx 的时候加载 fancyindex 源码作为 add-module。
从源码编译 nginx 及加载 第三方模块教程参考:https://niekun.net/index.php/archives/30.html
查看当前安装 nginx 是否包含 fancyindex:
nginx -V
使用方法很简单,在需要作为共享目录的 location 段,修改如下:
location /shared {
fancyindex on; # Enable fancy indexes.
fancyindex_exact_size off; # Output human-readable file sizes.
}
重新加载配置查看效果:
service nginx reload
由于 fancyindex 支持自定义页眉页脚和主题风格,所以可以使用 html 来进行修饰。
我的主题:https://github.com/nie11kun/FancyIndexTheme
下载主题到服务器,我放置在:/home/www/FancyIndexTheme
新建 fancyindex 的配置文件:fancyindex,我放在 /etc/nginx/my-server/fancyindex,内容如下:
fancyindex on;
fancyindex_header "/FancyIndexTheme/header.html";
fancyindex_footer "/FancyIndexTheme/footer.html";
fancyindex_show_path off;
fancyindex_name_length 255;
fancyindex_exact_size off;
fancyindex_localtime on;
fancyindex_time_format "%Y-%m-%d %H:%M";
详细的配置参数使用方法参考:https://github.com/aperezdc/ngx-fancyindex#fancyindex-time-format
在 nginx 配置文件中,需要作为共享文件夹的路径如 download 修改如下:
location /download {
root /home/www;
include my-server/fancyindex;
}
在 nginx 配置文件中,配置外部 html 配置页面文件夹访问路径,我的主题文件夹路径为 /home/www/FancyIndexTheme:
location /FancyIndexTheme {
root /home/www;
}
重新加载配置文件:
service nginx configtest
service nginx reload
现在可以打开共享页面查看效果。
]]>指令有三种:return, rewrite, and try_files
这是最简单也最推荐使用的指令,主要应用于将指定的 server 或 location 重定向到另一个固定的 server 或 location。
一个简单的例子,将客户端请求重定向到新的域名:
server {
listen 80;
listen 443 ssl;
server_name www.old-name.com;
return 301 $scheme://www.new-name.com$request_uri;
}
示例参数解释:
301: Moved Permanently
$scheme: protocol (http or https)
$request_uri: 域名后的整个 url
关于状态码的使用参考:https://niekun.net/index.php/archives/192.html
重定向到新 url 的基本语法:
return (301 | 302 | 303 | 307) url;
也可以将一个字符串作为一个响应:
return (1xx | 2xx | 4xx | 5xx) ["text"];
例如:
return 401 "Access denied because token is expired or invalid";
return 执行后,在浏览器中会看到跳转到新的链接。
此指令主要应用于一些更复杂的重定向,可以使用正则表达式进行匹配。此方式可以做动态链接的伪静态处理,隐藏 url 里的 index.php 等。
语法:
rewrite regex replacement [flag];
如果正则规则匹配到了请求的 uri,则会用 replacement 部分替换请求的 uri。rewrite 指令是按顺序执行的,也就是在一个快中可以写多个 rewrite 指令。使用 flag 来设置 uri 修改后的动作。
如果 replacement 里包含有 http://, https://, $scheme
则处理结束并给客户端发送重定向响应,客户端会重新访问新的 uri。
支持的 flag 标记:
http://, https://, $scheme
location /rewrite {
rewrite ^(.*)$ /echo last;
# rewrite ^(.*)$ /echo permanent;
rewrite ^(.*)$ https://niekun.net last;
}
上面三个示例:
用 regex 时,使用小括号()来设置 group,按照顺序 group 用 $1,$2...表示。
以下是一个例子,进行了如下处理:
如果没有匹配到,则返回状态码:402。
server {
# ...
rewrite ^(/download/.*)/media/(\w+)\.?.*$ $1/mp3/$2.mp3 last;
rewrite ^(/download/.*)/audio/(\w+)\.?.*$ $1/mp3/$2.ra last;
return 403;
# ...
}
此指令的参数为一个或多个文件或目录,以及一个最终内部 url。
语法:
try_files file ... uri;
处理过程为:nginx 检查列出的文件或文件夹地址是否存在,如果没有存在的话就内部重定向到指定的 url。为了让其工作,需要再定义一个 location 块捕获内部重定向的地址。
try_files 指令常用的变量为 $uri, 代表域名后的 url 部分。
以下例子进行了如下处理:
location /images/ {
try_files $uri $uri/ /images/default.gif;
}
location = /images/default.gif {
expires 30s;
}
ngx_http_rewrite_module
https://www.nginx.com/blog/creating-nginx-rewrite-rules/
This tutorial shows you how to set up strong SSL security on the nginx webserver. We do this by updating OpenSSL to the latest version to mitigate attacks like Heartbleed, disabling SSL Compression and EXPORT ciphers to mitigate attacks like FREAK, CRIME and LogJAM, disabling SSLv3 and below because of vulnerabilities in the protocol and we will set up a strong ciphersuite that enables Forward Secrecy when possible. We also enable HSTS and HPKP. This way we have a strong and future proof ssl configuration and we get an A+ on the Qually Labs SSL Test.
本文使用的配置需要相关软件的最低版本要求:
Nginx: 1.13.0 -- 升级教程:https://niekun.net/index.php/archives/30.html
openssl: 1.0.1 -- 升级教程:https://niekun.net/index.php/archives/183.html
首先需要生成一个 4096 bit 的 DH parameters:
openssl dhparam -out /etc/nginx/your.domain/dhparam.pem 4096
编辑 Nginx 配置文件,在server段加入或修改如下:
ssl_protocols TLSv1 TLSv1.1 TLSv1.2 TLSv1.3;
ssl_prefer_server_ciphers on;
ssl_ciphers ECDHE-RSA-AES256-GCM-SHA512:DHE-RSA-AES256-GCM-SHA512:ECDHE-RSA-AES256-GCM-SHA384:DHE-RSA-AES256-GCM-SHA384:ECDHE-RSA-AES256-SHA384;
ssl_dhparam /etc/nginx/your.domain/dhparam.pem;
ssl_ecdh_curve secp384r1;
ssl_session_timeout 10m;
ssl_session_cache shared:SSL:10m;
ssl_session_tickets off;
ssl_stapling on;
ssl_stapling_verify on;
resolver 8.8.8.8 1.1.1.1 valid=300s;
resolver_timeout 5s;
add_header Strict-Transport-Security "max-age=63072000; includeSubDomains; preload";
add_header X-Frame-Options DENY;
add_header X-Content-Type-Options nosniff;
add_header X-XSS-Protection "1; mode=block";
ssl_ciphers 的设置可能会影响一些老版本系统或浏览器的访问,以下是兼容 IE6/WinXP 的配置:
EECDH+AESGCM:EDH+AESGCM:ECDHE-RSA-AES128-GCM-SHA256:AES256+EECDH:DHE-RSA-AES128-GCM-SHA256:AES256+EDH:ECDHE-RSA-AES256-GCM-SHA384:DHE-RSA-AES256-GCM-SHA384:ECDHE-RSA-AES256-SHA384:ECDHE-RSA-AES128-SHA256:ECDHE-RSA-AES256-SHA:ECDHE-RSA-AES128-SHA:DHE-RSA-AES256-SHA256:DHE-RSA-AES128-SHA256:DHE-RSA-AES256-SHA:DHE-RSA-AES128-SHA:ECDHE-RSA-DES-CBC3-SHA:EDH-RSA-DES-CBC3-SHA:AES256-GCM-SHA384:AES128-GCM-SHA256:AES256-SHA256:AES128-SHA256:AES256-SHA:AES128-SHA:DES-CBC3-SHA:HIGH:!aNULL:!eNULL:!EXPORT:!DES:!MD5:!PSK:!RC4;
修改完成后测试配置及重启:
service nginx configtest
service nginx reload
service nginx restart
可以在这里测试网站安全级别,最高为 A+: https://www.ssllabs.com/ssltest/index.html
]]>此功能使用的是 Nginx 的 ngx_http_mp4_module 模块。
首先查看当前 nginx 是否已经安装了 ngx_http_mp4_module 模块:
nginx -v
查看是否已经有了对应模块,一般使用 apt 安装的都集成了此模块。
编辑你的 nginx 配置文件,加入下面的片段:
location /video {
mp4;
mp4_buffer_size 1m;
mp4_max_buffer_size 10m;
}
测试是否配置正确:
service nginx configtest
重新加载配置文件:
service nginx reload
现在你就可以在对应目录下放置一个mp4文件,访问看是否能够正常播放。
如果访问网页出现 500 错误,或者 nginx log 里提示mp4 moov atom is too large,则可能需要将 mp4_max_buffer_size 设置大一些。
支持的格式:.mp4, .m4v, .m4a
可以从任意时间开始播放,如:http://example.com/elephants_dream.mp4?start=238.88
start 后的数字为秒
也可以设置结束时间点:http://example.com/elephants_dream.mp4?start=238.88&end=555.55
]]>以下配置为将所有收到的80端口的请求都重定向到443端口,这会把此ip下的所有域名都转换:
server {
listen 80;
listen [::]:80;
server_name _;
return 301 https://$host$request_uri;
}
listen 80 default_server 表示这是唯一监听80端口的server块
server_name _ 表示监听所有使用的域名
以下配置为重定向特定域名的请求,此方式适用于此ip下绑定多个域名的情况:
server {
listen 80;
listen [::]:80;
server_name your.domain;
return 301 https://your.domain$request_uri;
}
设定我们的域名只接收443端口的访问:
server {
listen 443 ssl default_server;
listen [::]:443 ssl;
server_name foo.com;
}
server {
listen 443 ssl;
listen [::]:443 ssl;
server_name bar.com;
}
...
只能设置一个域名为default_server。
]]>acme
协议, 可以从 letsencrypt 生成免费的证书.官方说明:https://github.com/Neilpang/acme.sh
安装很简单:
apt-get install curl
curl https://get.acme.sh | sh
安装过程进行了以下几步:
/root/.acme.sh/
alias acme.sh="/root/.acme.sh/acme.sh"
cronjob 的任务可以使用命令 crontab -e
查看。
新版的acme.sh是在 .bashrc 里引用了. "/root/.acme.sh/acme.sh.env"
,此文件里定义了上面的alias。
如果安装完成后无法运行命令:acme.sh
,试着运行:source ~/.bashrc
重新加载alias,或者检查此文件内容。
acme.sh 实现了 acme 协议支持的所有验证协议. 一般有两种方式验证: http 和 dns 验证。dns 验证可以生成泛域名的证书,更加方便的适用于二级域名。
需要在你的网站根目录下放置一个文件, 来验证你的域名所有权,完成验证. 然后就可以生成证书了.
acme.sh --issue -d domain.you -d www.domain.you -d abc.domain.you --webroot /your/www/root
只需要指定域名, 可以同时生成多个域名到一个证书,并指定域名所在的网站根目录. acme.sh 会全自动的生成验证文件, 并放到网站的根目录, 然后自动完成验证. 最后会聪明的删除验证文件. 整个过程没有任何副作用.
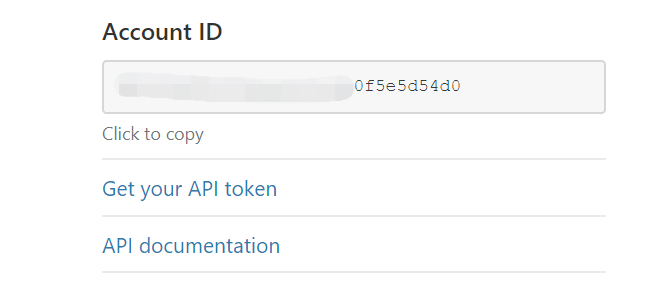
可以使用域名解析服务商的 api 来解析,我使用的是 cloudflare 作域名解析,进入 cf 的对应域名,在网站右下角有 account ID,记录下来,然后点击 get your api token:
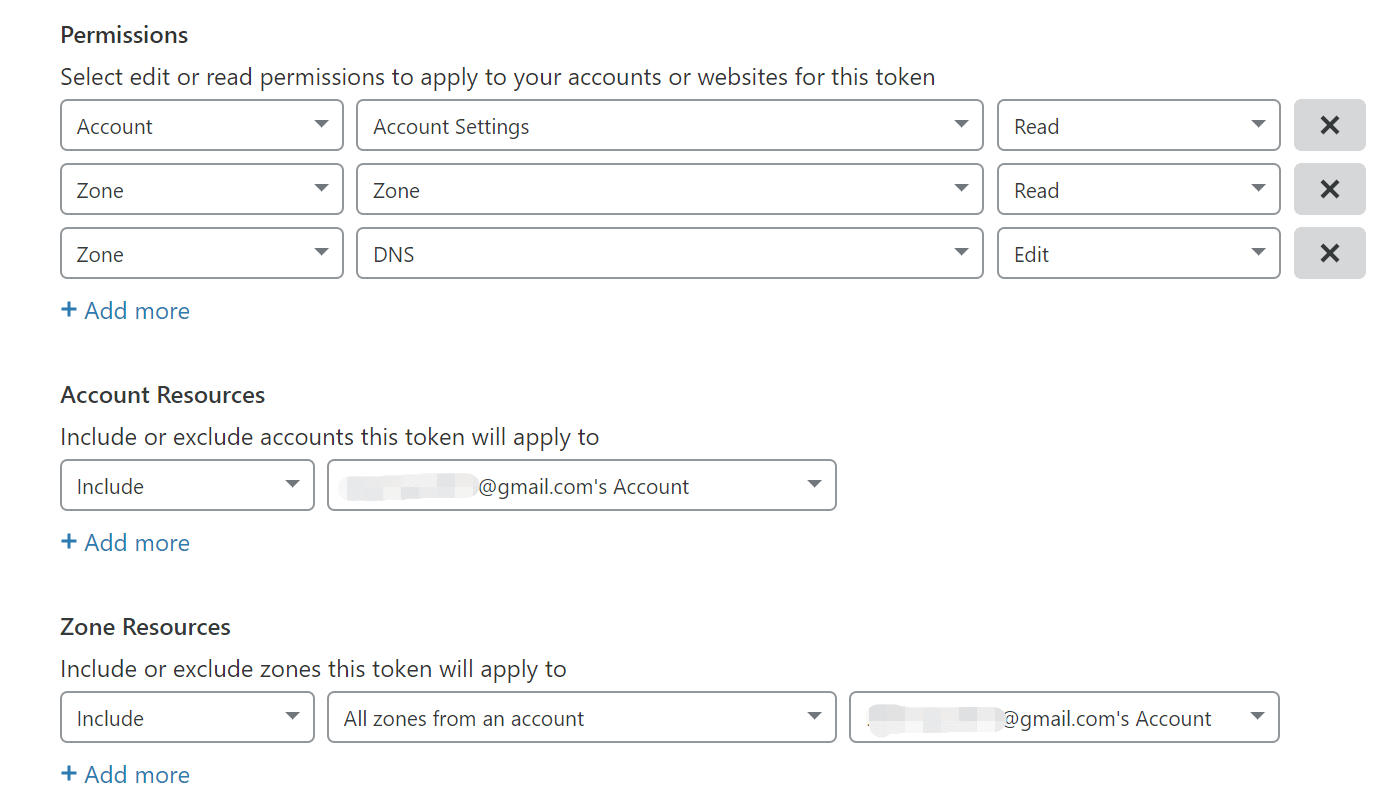
点击 create token:
增加如下内容:
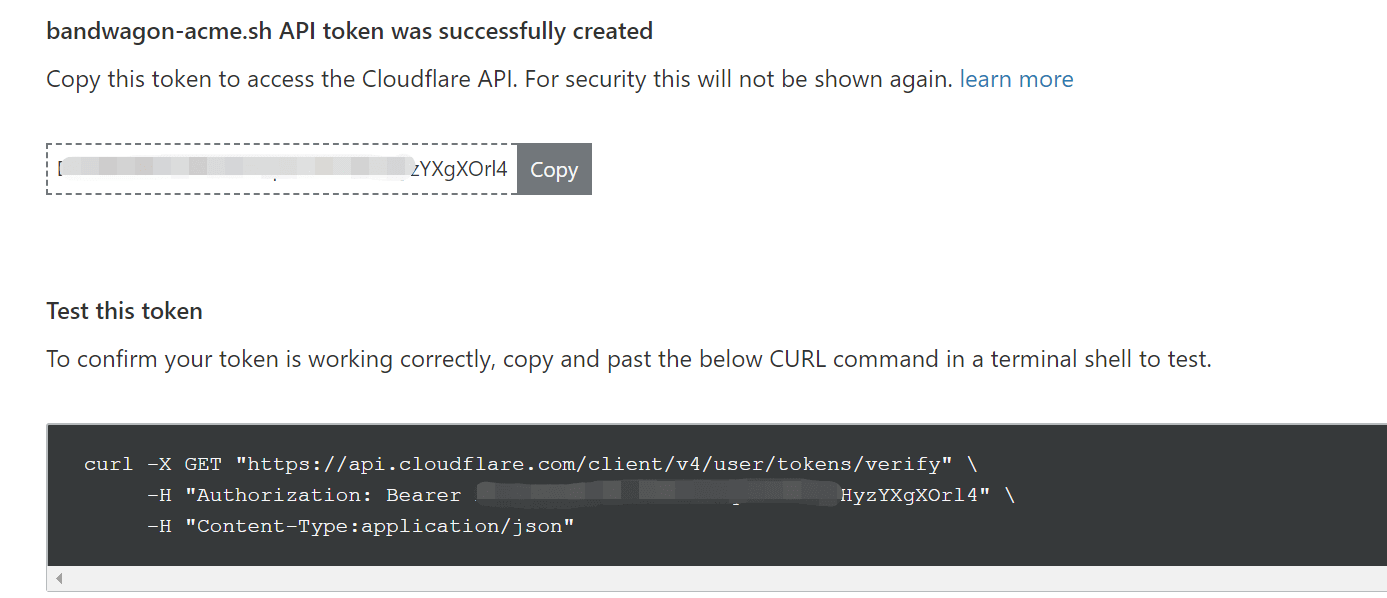
点击确认后,会显示 token,记录下来:
在终端根据上面的 account ID 和 token 输入如下命令:
export CF_Token="sdfsdfsdfljlbjkljlkjsdfoiwje"
export CF_Account_ID="xxxxxxxxxxxxx"
然后开始生成证书,可以指定顶级域名和泛域名:
acme.sh --issue --dns dns_cf -d example.com -d *.example.com
CF_Tokenand CF_Account_ID will be saved in ~/.acme.sh/account.conf and will be reused when needed.
没有报错信息,代表生成成功,如果有报错,查看生成 api token 时候的权限设置有没有问题。
默认生成的证书都放在安装目录下: /root/.acme.sh/
, 请不要直接使用此目录下的文件, 例如: 不要直接让 nginx/apache
的配置文件使用这下面的文件. 这里面的文件都是内部使用, 而且目录结构可能会变化.
正确的使用方法是使用 --installcert
命令,并指定目标位置, 然后证书文件会被copy到相应的位置, 例如:
acme.sh --install-cert -d domain.you \
--key-file /etc/nginx/domain.you/key.pem \
--fullchain-file /etc/nginx/domain.you/cert.pem \
--reloadcmd "service nginx force-reload"
以上命令安装证书后,会每 60 天自动更新证书,并自动运行 service nginx force-reload
。我喜欢将证书放到 nginx/domain.you 目录下。
server {
listen 443 ssl;
listen [::]:443 ssl;
server_name domain.you;
keepalive_timeout 70;
ssl_protocols TLSv1 TLSv1.1 TLSv1.2;
ssl_ciphers AES128-SHA:AES256-SHA:RC4-SHA:DES-CBC3-SHA:RC4-MD5;
ssl_certificate /etc/nginx/domain.you/cert.pem;
ssl_certificate_key /etc/nginx/domain.you/key.pem;
ssl_session_cache shared:SSL:10m;
ssl_session_timeout 10m;
...
}
重启Nginx服务: service nginx force-reload
这里用的是 service nginx force-reload
, 不是 service nginx reload
, 据测试, reload
并不会重新加载证书, 所以用的 force-reload
目前证书在 60 天以后会自动更新, 你无需任何操作. 今后有可能会缩短这个时间, 不过都是自动的, 你不用关心.
升级 acme.sh 到最新版 :
acme.sh --upgrade
如果你不想手动升级, 可以开启自动升级:
acme.sh --upgrade --auto-upgrade
之后, acme.sh 就会自动保持更新了.
你也可以随时关闭自动更新:
acme.sh --upgrade --auto-upgrade 0
以上就是使用acme.sh生成免费证书的简单过程,安装完成后使用https登录你的网站看能否正常访问,如果不能试着重启系统。
配置完成后可以到 ssl labs 测试:https://www.ssllabs.com/ssltest/index.html
关于 Nginx 安全性更强的配置参考: https://niekun.net/archives/187.html
Nginx
记得还是一年前安装的,一直没有升级,最近发现版本都到了1.14了,我的还是1.4,就想做一次升级。由于使用Nginx
用到一些配置文件,所以我预计升级会导致配置文件恢复到默认,所以查询了一些资料后,安全的做了升级。
备份nginx.conf配置文件:
cp nginx.conf nginx.conf.bak
我将自定义server放在单独文件夹内 /etc/nginx/my-server/, 所以配置文件是安全的,升级后需要重新在 nginx.conf 里 include 一下即可。
安装依赖包:
apt-get install curl gnupg2 ca-certificates lsb-release
设置安装稳定版:
echo "deb http://nginx.org/packages/ubuntu `lsb_release -cs` nginx" \
| sudo tee /etc/apt/sources.list.d/nginx.list
导入 nginx 官方 key 使 apt 可以鉴定来源:
curl -fsSL https://nginx.org/keys/nginx_signing.key | sudo apt-key add -
Verify that you now have the proper key:
apt-key fingerprint ABF5BD827BD9BF62
The output should contain the full fingerprint 573B FD6B 3D8F BC64 1079 A6AB ABF5 BD82 7BD9 BF62 as follows:
pub rsa2048 2011-08-19 [SC] [expires: 2024-06-14]
573B FD6B 3D8F BC64 1079 A6AB ABF5 BD82 7BD9 BF62
uid [ unknown] nginx signing key <signing-key@nginx.com>
安装Nginx,期间会提示有些文件要修改,根据提示覆盖Y
或查看不同D
,'N'保留原文件:
apt-get update
apt-get install nginx
如果安装失败,提示 error 类似:/var/cache/apt/archives/nginx_1.14.1-1~trusty_amd64.deb,运行下面命令:
apt-get -f install
apt-get remove nginx-common
apt-get install nginx
安装完成后,打开备份的nginx.conf.bak文件,将里面你之前做了自定义修改的字段复制回当前nginx.conf文件内,或者恢复单独的在文件夹的配置文件,并在 nginx.conf 里 include 一下。
检查配置文件是否正确:
service nginx configtest
重启Nginx
服务:
service nginx reload
service nginx start
以上就完成了从官方源 Nginx 的安装/升级。
nginx源码编译适用于需要安装第三方的一些模块的情况,例如需要 fancyindex 等模块。
nginx 使用 GNU 编译系统,使用 configure 和 make 来工作,关于 GNU 编译系统的详细说明参考:https://blog.niekun.net/archives/883.html
首先检查是否安装了 g++ 编译器,执行:
gcc -v
如果返回错误,说明缺少 gcc 编译器:
sudo apt install gcc g++ -y
从此处下载最新源码:http://nginx.org/en/download.html
下载源码并解压:
wget http://nginx.org/download/nginx-1.17.6.tar.gz
tar -zxvf nginx-1.17.6.tar.gz
下载第三方模块,如:fancyindex:
git clone https://github.com/aperezdc/ngx-fancyindex.git ngx-fancyindex
建立安装目录:
mkdir /opt/nginx-1.17.6
ln -s /opt/nginx-1.17.6 /opt/nginx
运行配置脚本:
cd nginx-1.17.6
./configure --add-module=../ngx-fancyindex [其他参数项]
如果要加入多个第三方模块,需要单独再用一个 --add-module=...
其他参数项:
如果不知道该加入那些附加编译参数,通过 nginx -V 可以查看当前官方预编译版本的配置变量。
我使用的配置如下,使用了两个第三方 module:
./configure --prefix=/opt/nginx-1.17.6 \
--user=nginx --group=nginx \
--with-compat --with-file-aio --with-threads \
--with-http_addition_module --with-http_auth_request_module --with-http_dav_module --with-http_flv_module --with-http_gunzip_module --with-http_gzip_static_module --with-http_mp4_module --with-http_random_index_module --with-http_realip_module --with-http_secure_link_module --with-http_slice_module --with-http_ssl_module --with-http_stub_status_module --with-http_sub_module --with-http_v2_module \
--with-mail --with-mail_ssl_module \
--with-stream --with-stream_realip_module --with-stream_ssl_module --with-stream_ssl_preread_module \
--add-module=../echo-nginx-module \
--add-module=../ngx-fancyindex
需要提前安装的 library 库:
libpcre3-dev
zlib1g-dev
libxml2-dev
libxslt1-dev
官方编译手册里面列出了所有可用的编译参数:http://nginx.org/en/docs/configure.html
执行后如果有报错,一般是设定参数里有需要的依赖环境未安装,如:openssl,PCRE Library 等。根据提示安装需要的库再次执行 configure。
编译和安装:
make
make install
可执行文件路径为:/opt/nginx/sbin/nginx
,添加到系统 PATH 路径:
Ln -s /opt/nginx/sbin/nginx /usr/local/bin/nginx
刷新 link 及缓存:
ldconfig
测试是否可用:
nginx -v
如果安装失败,提示 error,尝试运行下面命令,然后再次执行上面的 make install:
apt-get -f install
apt-get remove nginx-common
安装完成后的设置和上面 ppa 安装类似。
如果运行 service nginx start
后,nginx 无法运行,查看 80 端口是否被占用,选择卸载或 kill 相关进程:
lsof -i:80
如果使用 systemd 管理进程,需要手动添加 service 服务文件。
在 /usr/lib/systemd/system/
目录下新建文件 nginx.service
,内容如下:
[Unit]
Description=The NGINX HTTP and reverse proxy server
After=syslog.target network-online.target remote-fs.target nss-lookup.target
Wants=network-online.target
[Service]
Type=forking
PIDFile=/opt/nginx/logs/nginx.pid
ExecStartPre=/usr/local/bin/nginx -t
ExecStart=/usr/local/bin/nginx
ExecReload=/usr/local/bin/nginx -s reload
ExecStop=/bin/kill -s QUIT $MAINPID
PrivateTmp=true
[Install]
WantedBy=multi-user.target
重新加载配置文件:
systemctl daemon-reload
启动服务:
systemctl start nginx
开机启动:
systemctl enable nginx
以上就是 nginx 的安装教程。
]]>官方相关文档:http://nginx.org/en/docs/http/ngx_http_autoindex_module.html
在service里的新建需要共享目录的location段修改如下:
location /downloads {
root /home;
autoindex on;
autoindex_exact_size on;
autoindex_localtime on;
}
后三句为打开当前location段的目录索引功能,显示文件大小,显示文件创建日期,建议只对需要共享的目录打开目录功能。
]]>